Ultrasonic Cleaning Solution Guide
Learn how to choose a water-based ultrasonic cleaning solution, when diluted dish soap is enough, and which liquids must never go in the tank.
An ultrasonic cleaner can only do as much as the liquid in its tank allows. The machine creates millions of tiny bubbles that collapse against a surface and lift dirt away, but those bubbles need the right liquid to form, travel and carry soil away from the part. Put the wrong liquid in the tank and you can get weak cleaning, cloudy residue, damaged finishes, or — in the worst case — a serious safety hazard. This guide explains how to choose a water-based cleaning solution, when a little diluted dish soap is enough, when a dedicated commercial solution is the better choice, and how to match the solution to grease, polishing compound, limescale and carbon deposits. It also sets out the liquids that must never go into an ultrasonic tank, and a simple routine for dosing and changing the solution.
How Water-Based Solutions Work
Ultrasonic cleaning works through cavitation. A transducer sends high-frequency sound waves through the tank, and those waves create tiny vacuum bubbles in the liquid. When the bubbles collapse, they release a short, localised burst of energy that lifts dirt, oil and loose particles from the surface. For that process to work well, the liquid must transmit sound efficiently, wet the surface completely, and hold the loosened soil in suspension long enough for it to be rinsed away. Plain water can do the first part, but it is a poor wetting agent on its own. Its surface tension is high, so it beads on oily metal and struggles to reach into blind holes, threads and fine grooves. A cleaning solution lowers surface tension, helps the liquid spread into small spaces, and gives the loosened dirt somewhere to go instead of settling straight back onto the part.
That is why almost every practical ultrasonic routine uses water plus a small amount of a suitable cleaning agent, rather than water alone. The agent does not need to be aggressive to be effective. In fact, the gentlest solution that removes the soil in a reasonable time is usually the best choice, because it protects finishes, seals and delicate parts, and it leaves less residue to rinse off. The job of the solution is to support cavitation, not to replace it. A good solution makes the bubbles form evenly, keeps the tank liquid clear enough for the sound waves to travel, and breaks the bond between the soil and the surface so the bubbles can finish the work. When the solution is wrong — too weak, too strong, too foamy, or chemically wrong for the material — cleaning slows down, residue appears, and parts can come out looking worse than they went in.
Choosing a Water-Based Cleaning Solution
Start with the material you are cleaning and the soil you need to remove. Most water-based ultrasonic solutions are built around surfactants, which are the ingredients that lower surface tension and lift oil, and a mild alkaline or neutral base that helps break down grease. Some add chelating agents that soften hard water and keep minerals from settling on parts, and some add corrosion inhibitors that protect steel, brass and aluminium during and after cleaning. Read the label for the materials it is made for, and check whether it is safe for the metals, plastics, rubber seals and coatings on your parts. A solution made for heavy workshop grease is not the same as one made for optical glass or jewellery, and using the wrong one can dull a finish, cloud a lens or damage a soft stone.
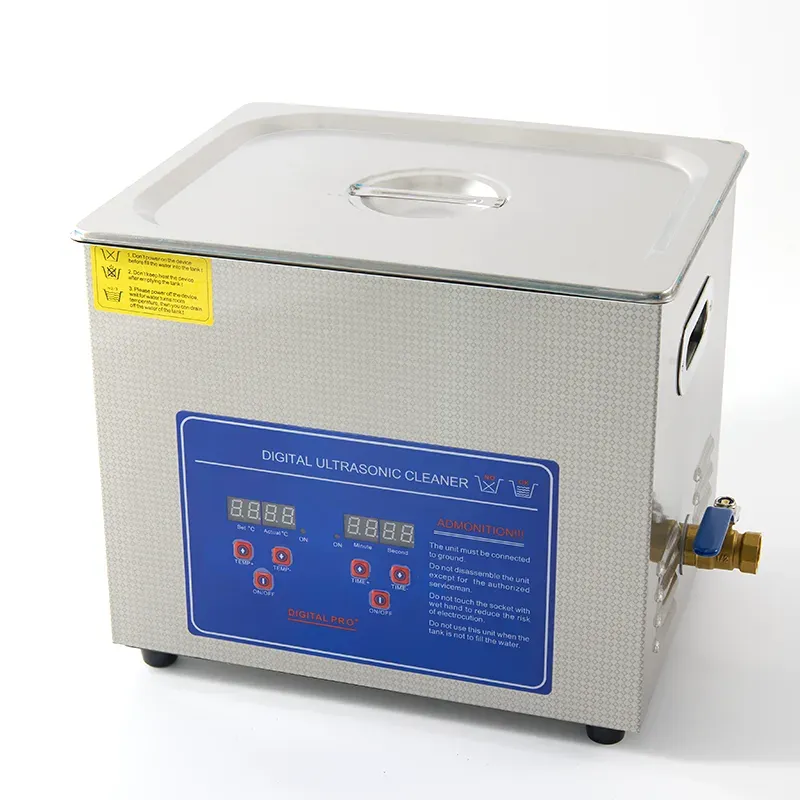
Foam is another practical test. A solution that foams heavily in the tank can trap air at the surface and weaken cavitation, and it can overflow a small tank when the heater is on. Low-foam formulas are usually the better choice for ultrasonic use, especially in heated tanks. Concentration matters too: follow the dilution ratio on the label as a starting point, then adjust in small steps. More solution is not always better, because an over-strong mix can leave a film that needs extra rinsing, while a mix that is too weak will clean slowly and may need a second cycle. For general workshop cleaning, a mid-size tank such as the 10L Digital Ultrasonic Cleaner with Heater and Degas gives enough room for tools, brackets and hardware while keeping solution use reasonable. A heater and a degas function help the solution work at a stable temperature and remove dissolved gas that can weaken cavitation at the start of a cycle.
Diluted Dish Soap: When It Works and When It Does Not
Diluted dish soap is the most common home answer, and for light, everyday cleaning it often works well. A few drops in a tank of warm water will cut fingerprints, light grease and dust from jewellery, glasses, watch straps and small metal parts, and it is easy to find, easy to rinse and gentle on most materials. Use only a small amount: a large squirt will create a thick layer of foam that sits on the surface, traps air and reduces the energy that reaches the parts. Stir the solution gently, let it settle for a minute, and run a short cycle first to see how the parts respond. If the parts come out clean and rinse clear, the simple mix was enough, and there is no need to reach for a stronger product.
Dish soap reaches its limit with heavier soils. It is not made to dissolve thick cutting oil, dried polishing compound, baked-on carbon or heavy limescale, and it has no corrosion inhibitors or water softeners, so repeated use on steel parts in hard water can leave spots and, over time, dull surfaces. It can also leave a thin film on parts that need a spotless finish. For small, delicate items such as rings, earrings and glasses, a compact tank such as the SJ-H2 Ultrasonic Cleaner for Jewellery and Eyewear — 900ml is often a better fit than a large workshop tank, because it uses less solution and is easy to place on a counter. When the soil is heavy, when parts must be spotless, or when you are cleaning the same type of part every day, a dedicated commercial ultrasonic solution is the more reliable choice, because it is made for that soil and that material, and its dilution ratio is written on the label.
Matching the Solution to the Soil
Grease and oil are the easiest match. A mild alkaline, low-foam solution with good surfactants will lift most workshop grease, fingerprints and cutting oil, especially when the tank is heated and the parts are given time to soak for a few minutes before the cycle starts. Let the solution do the first part of the work: place the parts in the basket, lower them into the tank, and wait briefly so the solution can wet the surface and start to soften the oil. Polishing compound is different. It is a fine, sticky paste that clings to crevices and threads, and it needs a solution that can hold fine particles in suspension so they do not settle back onto the part. A longer cycle at a moderate temperature usually helps, and a second rinse in clean water is worth the time, because compound left in a thread or a hinge will show up later as a dull patch.
Limescale and mineral deposits need a different approach again. These are hard, chalky layers left by hard water, and a general alkaline cleaner will not dissolve them quickly. An acidic descaling solution made for ultrasonic use can help, but it must be chosen carefully, because acids can attack aluminium, brass and some coatings if the concentration or the time in the tank is wrong. Test on one part first, keep the cycle short, and rinse at once. Carbon deposits, such as the dark crust on engine parts and exhaust components, are among the hardest soils to remove. They usually need a stronger alkaline solution, heat and a longer cycle, and sometimes more than one cycle with fresh solution. Do not expect a single short cycle to remove carbon that has been baked on for years, and do not raise the concentration far above the label ratio to force the result, because that risks the finish more than it helps the cleaning.
Liquids That Must Never Go in the Tank
Some liquids are dangerous in an ultrasonic cleaner and must never be used, whatever the cleaning problem. Petrol, white spirit, acetone, thinners, alcohol-based solvents and other flammable liquids are the clearest example. An ultrasonic tank heats the liquid, agitates it and creates a fine mist above the surface, so a flammable liquid can catch fire or release vapours that ignite from a spark, a hot element or static. The risk is not theoretical: a tank full of solvent is a fire and explosion hazard in a home or a workshop, and it can also damage the tank seals, the basket and the transducer bonding. If a part needs a solvent, clean it by hand in a suitable area away from the ultrasonic cleaner, or ask your supplier what water-based alternative is made for that soil.
Strong acids, strong caustic soda and undiluted bleach are also unsuitable for a general ultrasonic tank. They can corrode the stainless steel tank, attack the welds and seals, and give off fumes that are harmful to breathe. They can also damage the parts themselves, especially aluminium, brass, zinc and plated finishes. The same caution applies to any liquid you have not checked against the material of your parts: if you are not sure what a liquid will do to a finish, a stone, a lens coating or a rubber seal, test it on a spare part or a hidden area first, and keep the first cycle short. When in doubt, use plain warm water with a small amount of a mild, dedicated ultrasonic solution, and stop the cycle to inspect the part before running it again.
Dosing, Changing and Rinsing
A simple routine keeps the solution working well. Fill the tank to the fill line with clean water, add the solution at the ratio on the label, and stir it gently so it mixes evenly. Run the degas function for a few minutes before the first cleaning cycle if your machine has one, because fresh tap water holds dissolved gas that weakens cavitation until it is driven out. Place parts in the basket so they do not touch each other or rest directly on the tank floor, and do not overload the basket, because crowded parts block the sound waves and clean unevenly. After cleaning, lift the basket out, let the parts drain for a few seconds, and rinse them in clean water. A rinse step matters more than most people expect: it removes the loosened soil and the last of the solution, so parts dry clean and spot-free.
Change the solution when it stops working well. The signs are easy to see: the liquid looks cloudy or dark, it smells stale, parts come out with a film, or the same cycle that used to clean in a few minutes now needs much longer. For light home use, a tank of solution may last several sessions, while a busy workshop may need a fresh mix every day. Drain the tank through the drain valve if the machine has one, wipe the inside of the tank with a soft cloth, and rinse it with clean water before refilling. Never leave dirty solution in the tank for a long period, because it can leave deposits on the tank walls and the heater, and it can start to smell. Keep a note of the dilution you used and how long the solution lasted, so the next mix is easy to repeat.
Planning a purchase for your business? Send an inquiry through the form on this page and we will recommend the right model with full specifications and a quotation. Mob / WhatsApp / WeChat: +86 15920036975. Private label and OEM are available from 300 units.